Overwatch 2 Unveils Intriguing Hidden Features
Update Your Overwatch 2 Username: A Comprehensive Guide
Your Overwatch 2 in-game name is more than just a nickname; it's your online identity. This guide details how to change your BattleTag (PC and cross-play enabled consoles) or platform-specific username (Xbox and PlayStation with cross-play disabled).
Table of Contents
- Can I Change My Name in Overwatch 2?
- How to Change Your Name in Overwatch 2
- Changing Your Name on PC
- Changing Your Name on Xbox
- Changing Your Name on PlayStation
- Final Recommendations
Can I Change My Name in Overwatch 2?
Yes! Changing your name is straightforward, though the method depends on your platform and cross-play settings.
How to Change Your Name in Overwatch 2
Your in-game name is tied to your Battle.net account (BattleTag).
Key Considerations:
- Free Name Change: You get one free BattleTag change.
- Paid Name Changes: Subsequent changes incur a fee (approximately $10 USD; check your region's Battle.net Shop for the exact cost).
- Cross-Play: If cross-play is enabled, use the Battle.net method regardless of your platform. If disabled, use the console's settings.
Changing Your Name on PC (or Console with Cross-Play Enabled)
-
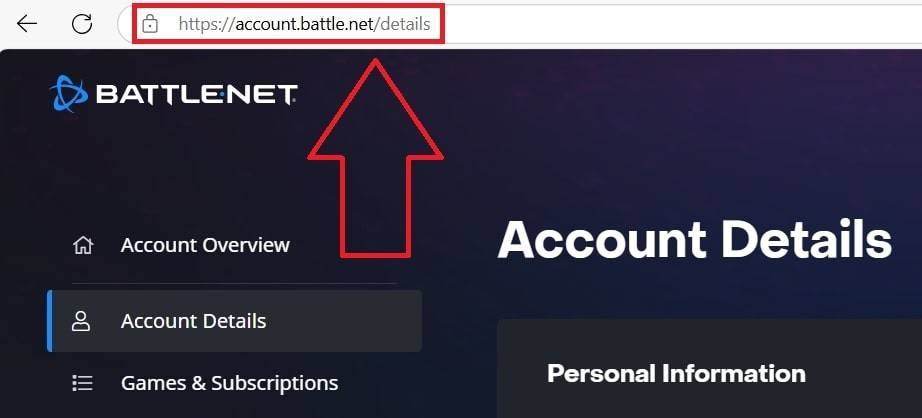
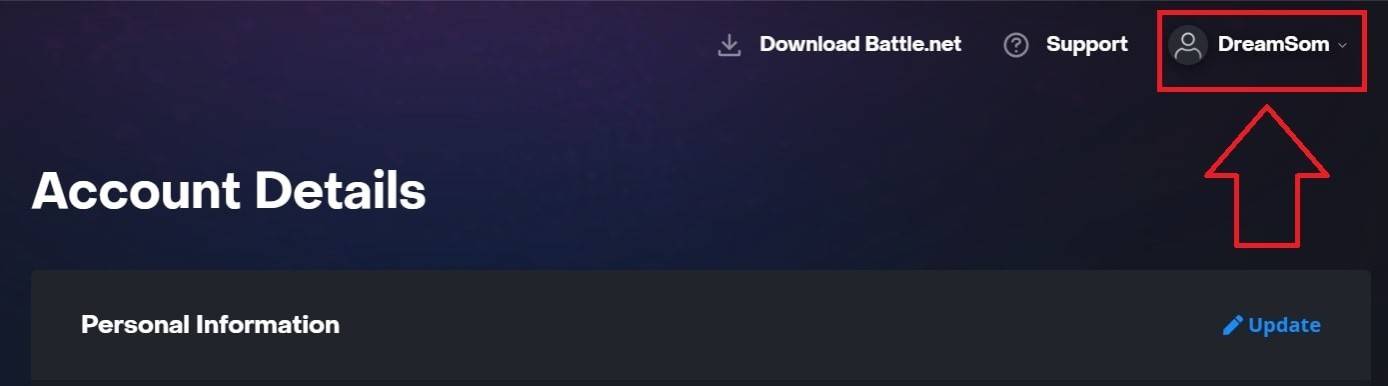
Log in: Access the official Battle.net website and log into your account.
-
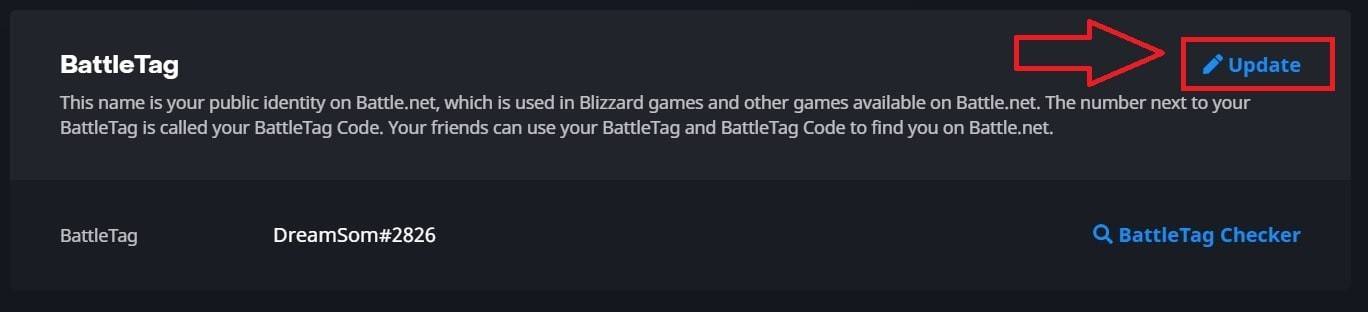
Account Settings: Click your username (top-right), then select "Account Settings." Locate your BattleTag.
-
Update BattleTag: Click the blue "Update" (pencil icon) next to your BattleTag.
-
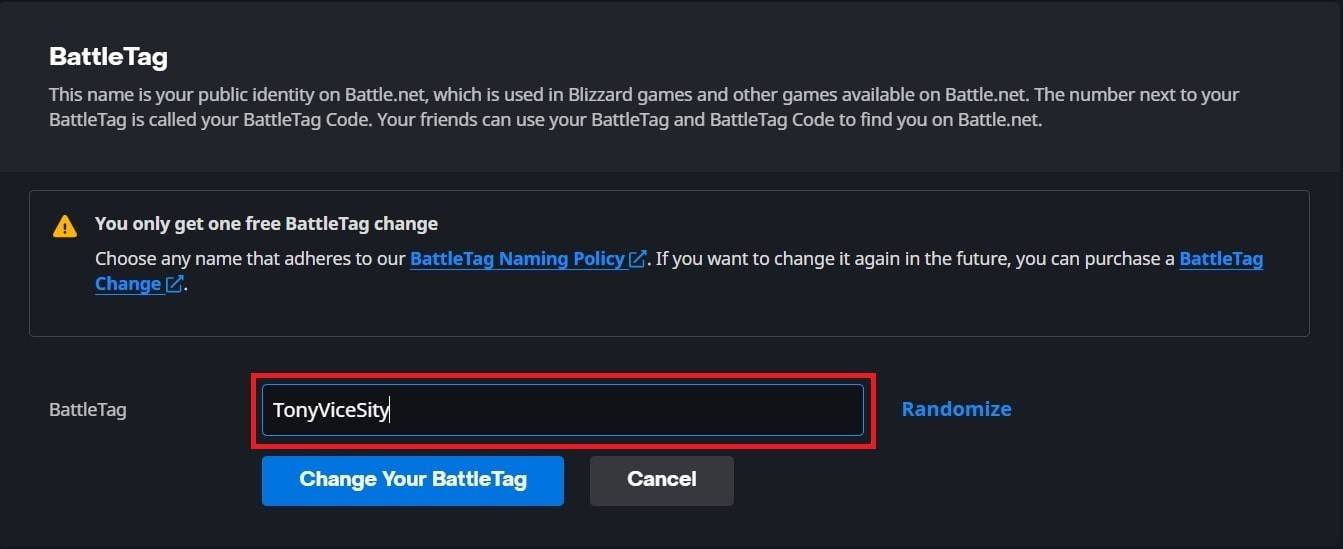
Enter New Name: Enter your desired name, adhering to BattleTag naming policies.
-
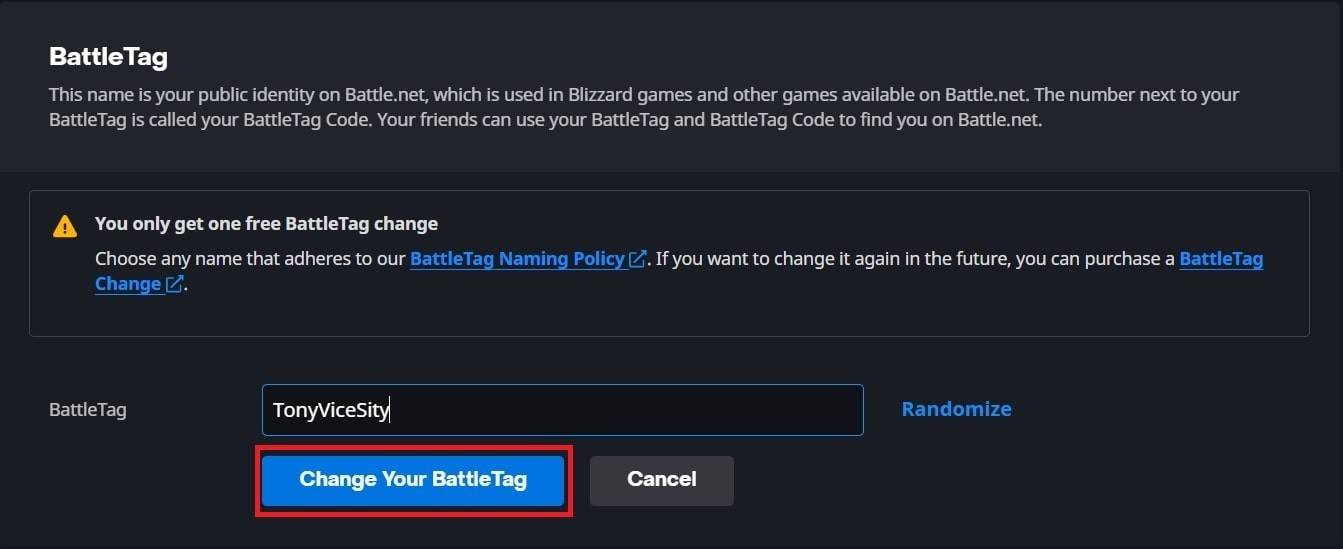
Confirm: Click "Change Your BattleTag." Note: Changes may take up to 24 hours to fully propagate.
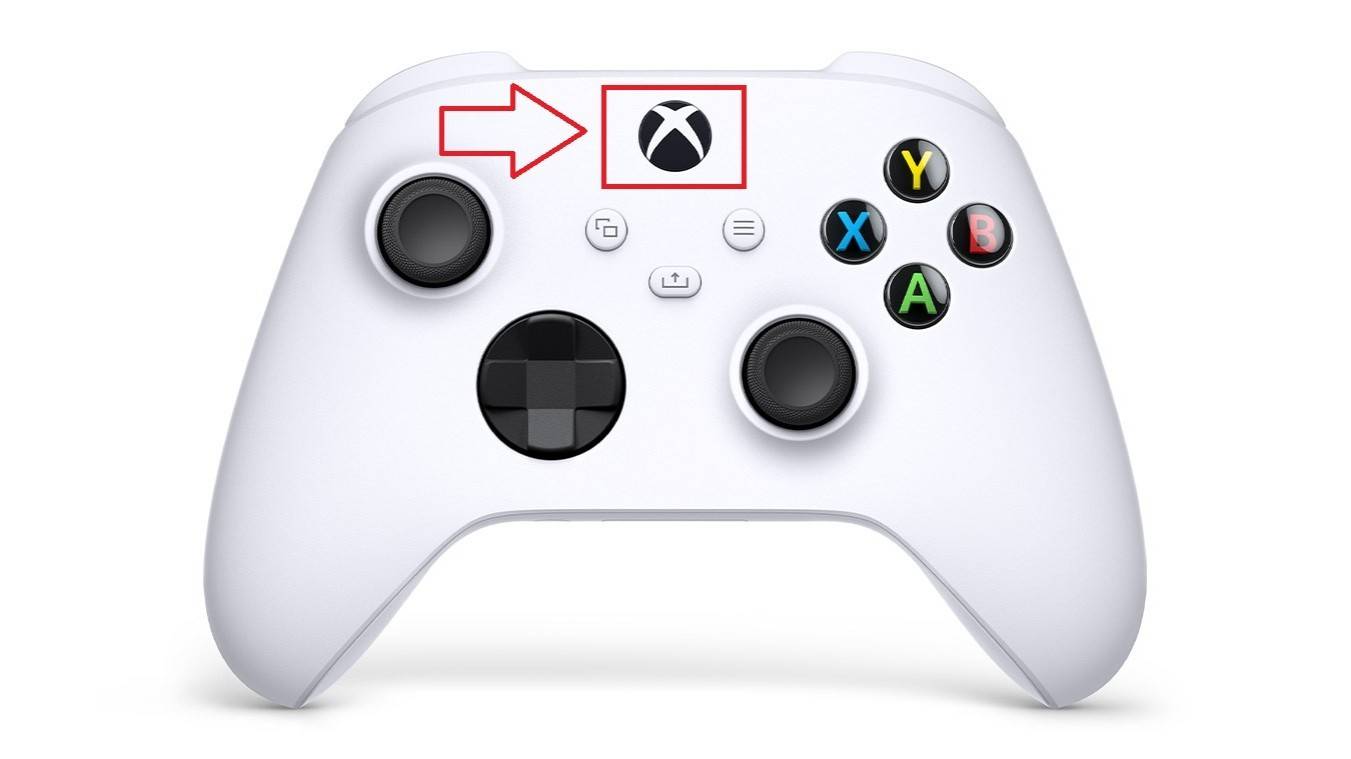
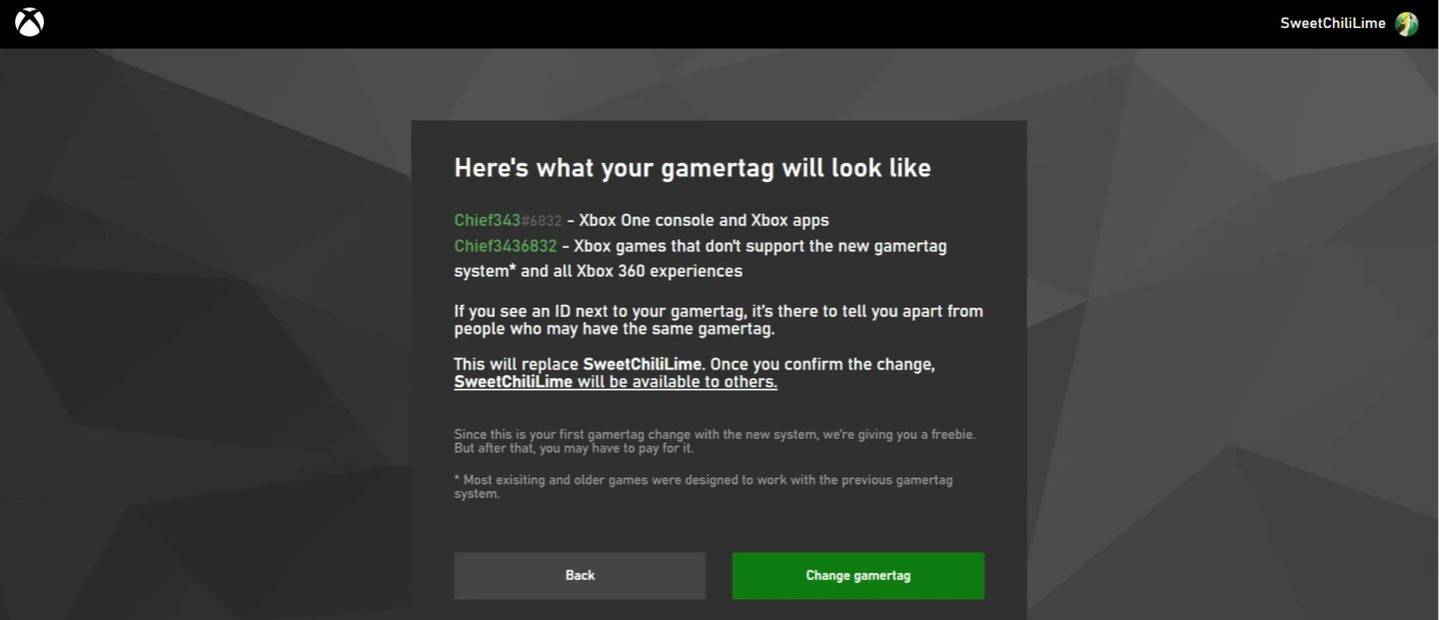
Changing Your Name on Xbox (Cross-Play Disabled)
-
Open Menu: Press the Xbox button.
-
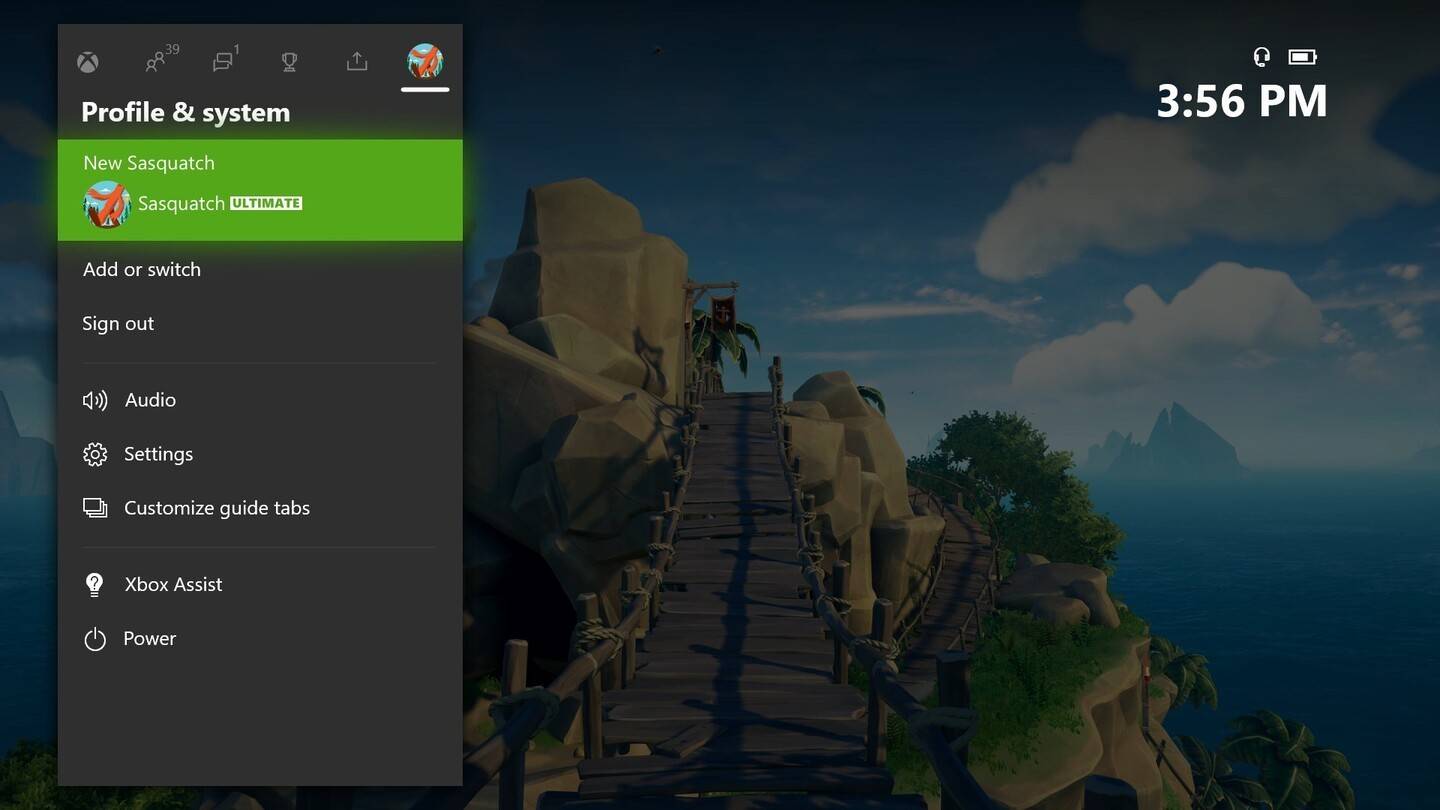
Profile & System: Navigate to "Profile & System," then your profile.
-
Customize Profile: Select "My Profile," then "Customize Profile."
-
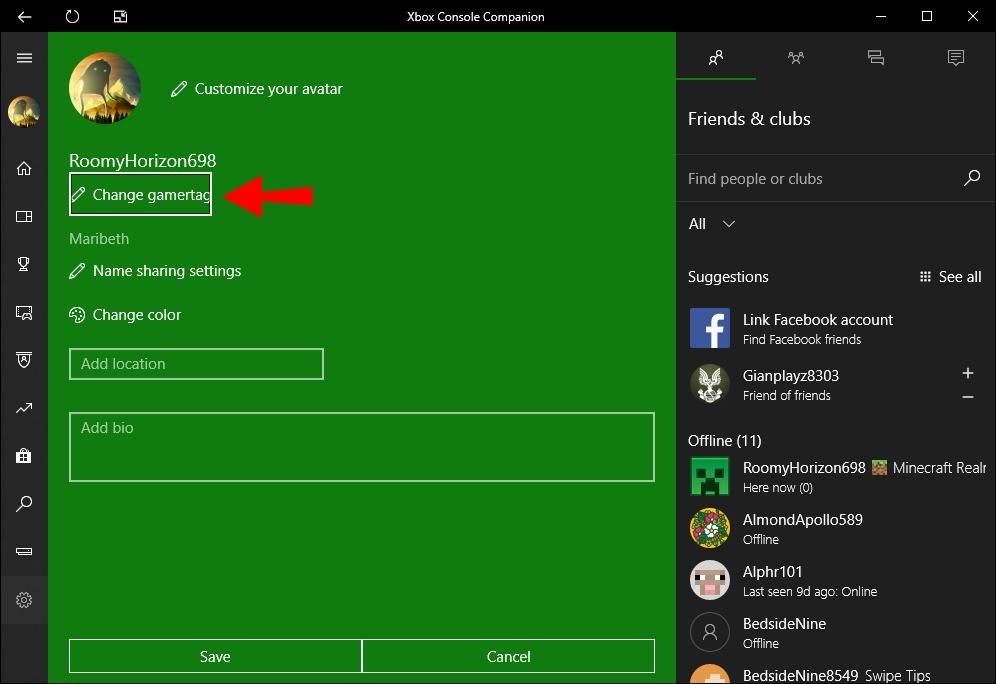
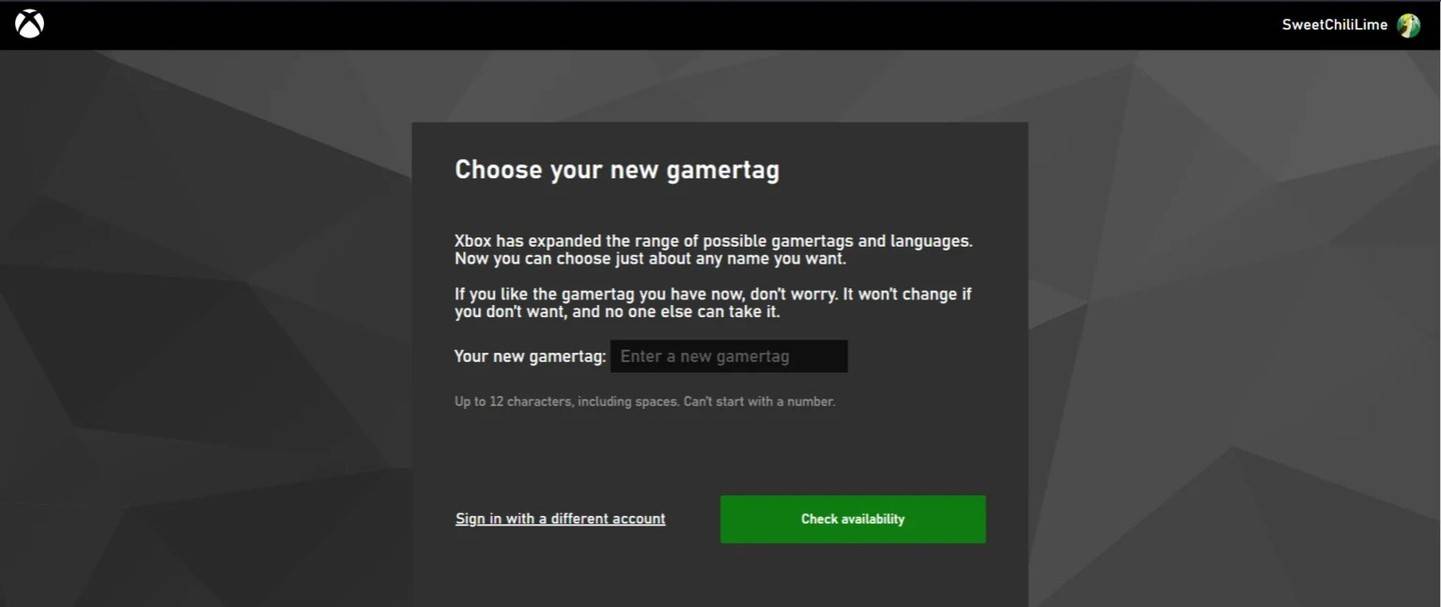
Change Gamertag: Click your Gamertag, enter the new name, and follow the on-screen prompts.

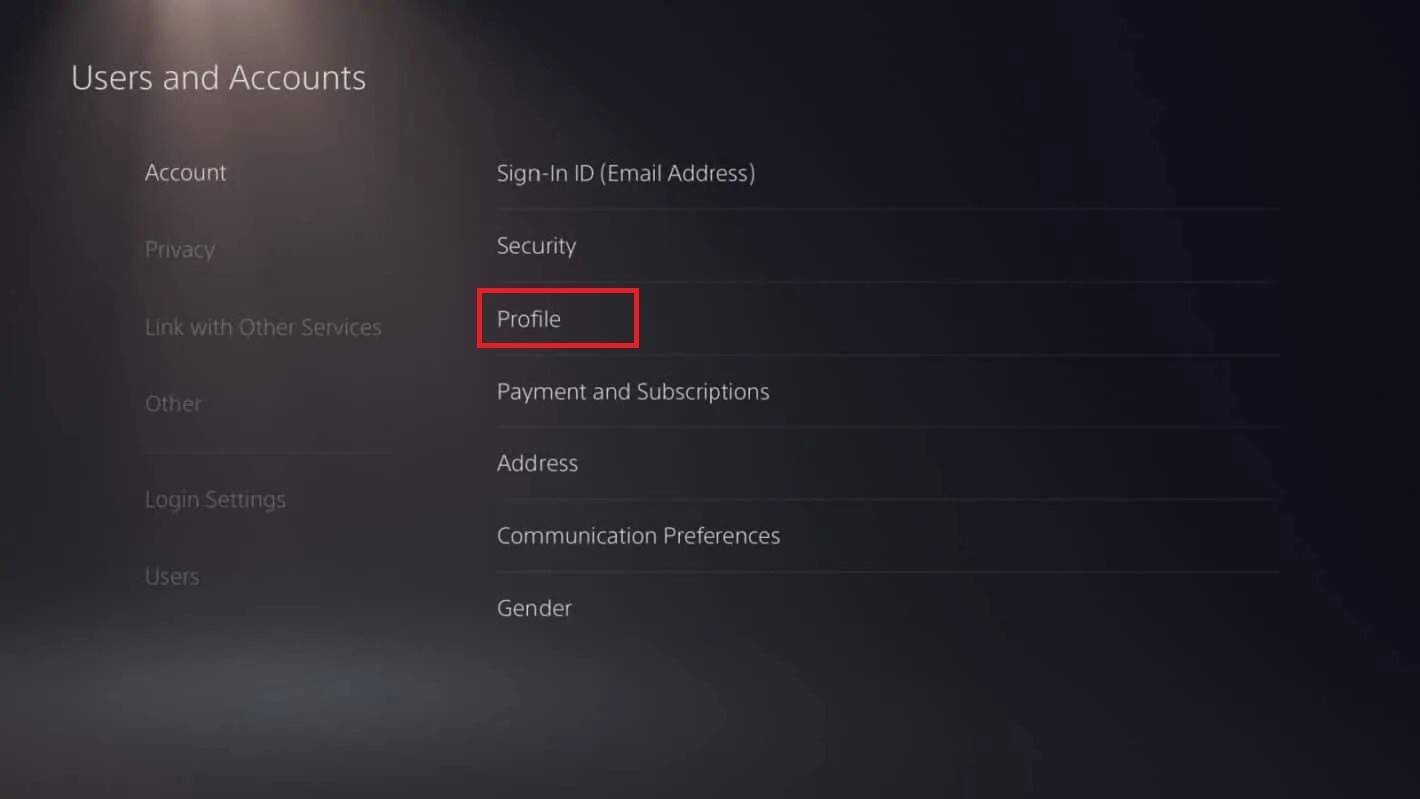
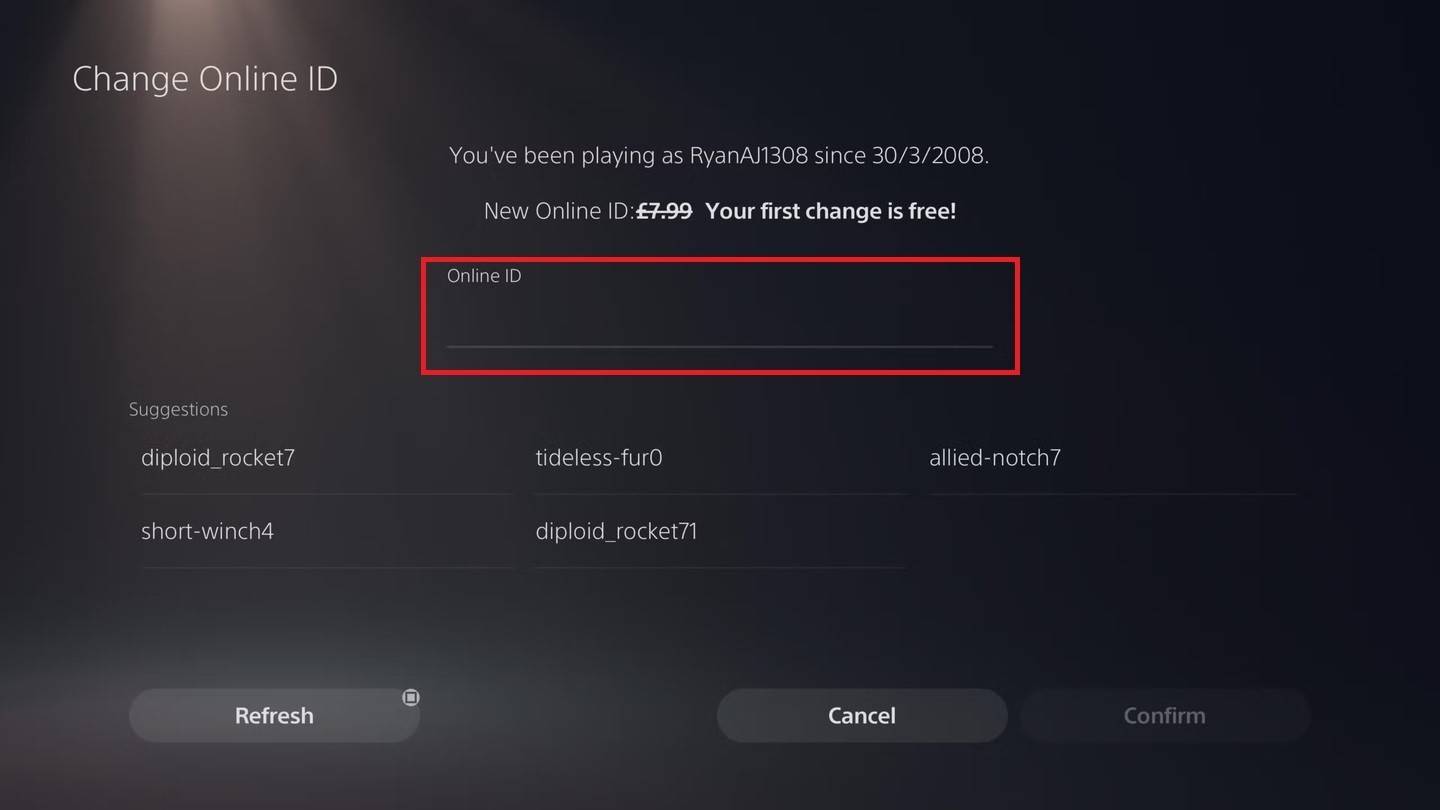
Changing Your Name on PlayStation (Cross-Play Disabled)
-
Settings: Access console settings.
-
Users and Accounts: Select "Users and Accounts," then "Accounts," and finally "Profile."
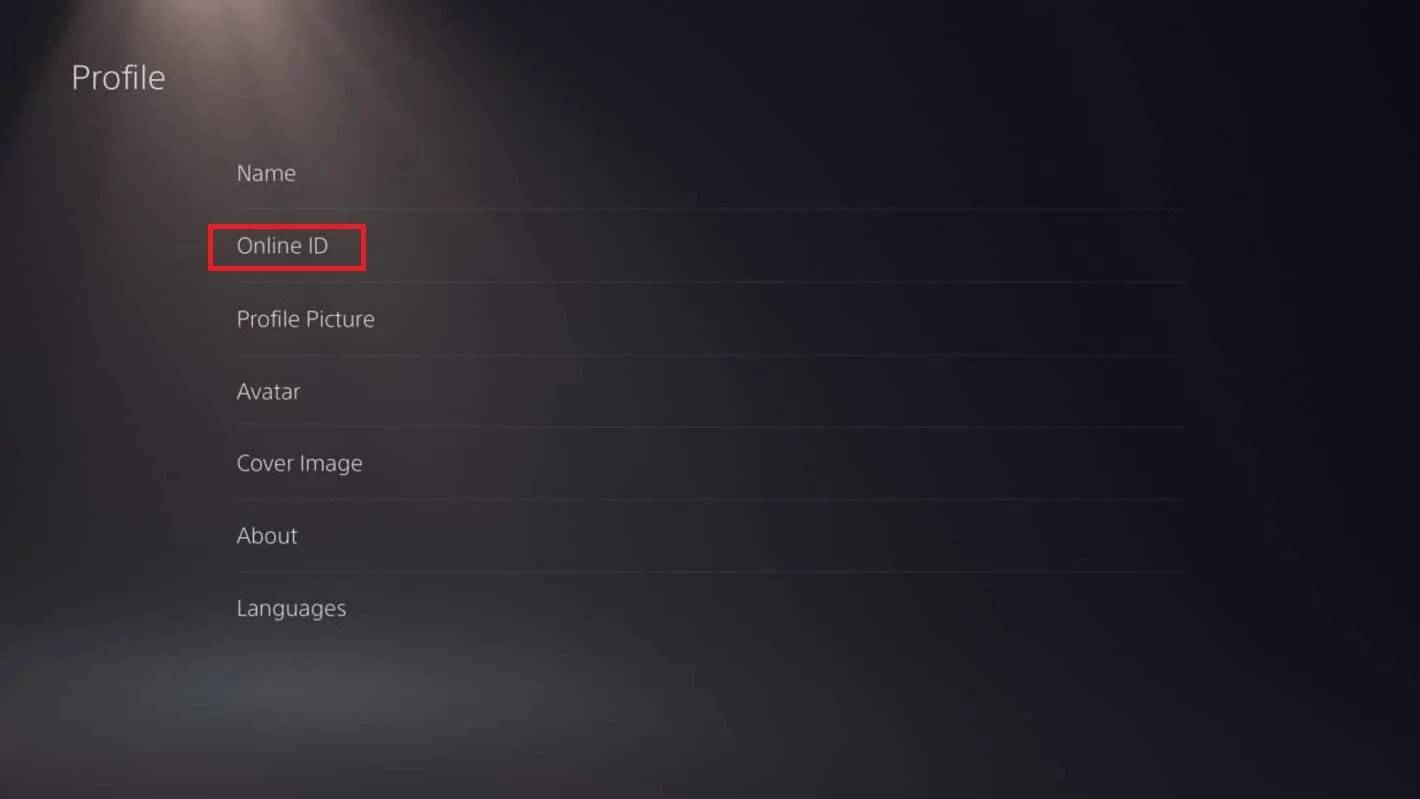
-
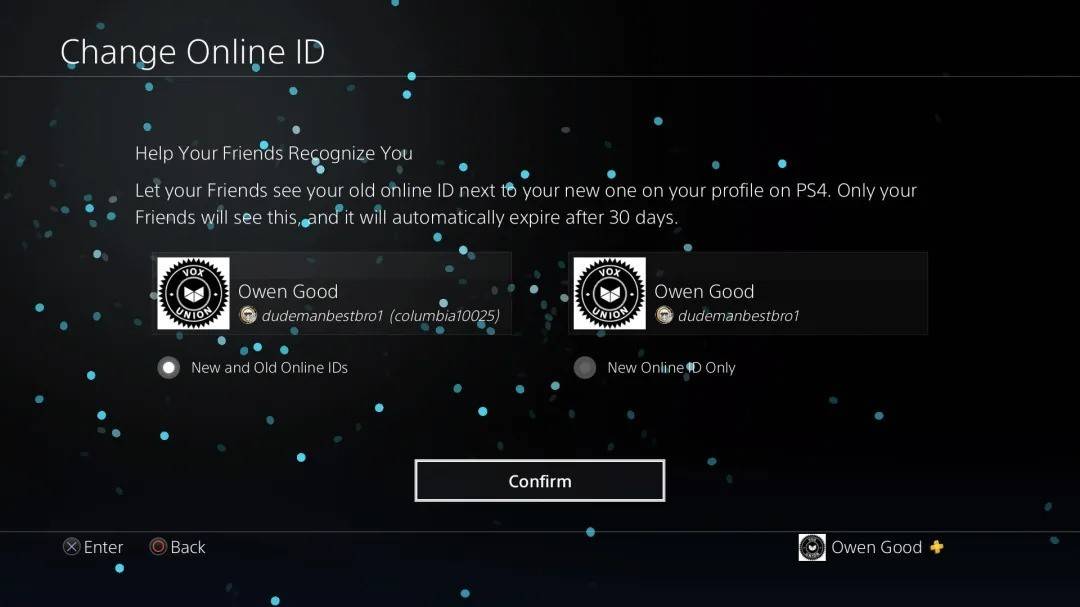
Change Online ID: Find "Online ID" and click "Change Online ID." Enter your new name and confirm.

Final Recommendations
- Cross-Play Status: Determine your cross-play setting before proceeding.
- Free Change: Remember your single free BattleTag change.
- Wallet Funds: Ensure sufficient funds in your Battle.net Wallet for paid changes.
By following these steps, you can seamlessly update your Overwatch 2 username and maintain a current online identity.
Latest Articles